
Strain Gauge Usage
Adhesive technology for strain gauges
In electrical measurement technology, the quality of strain gauge pasting has a significant impact on the reliability of measurement and is a crucial step that must be taken seriously. To improve the accuracy of electrical measurement results, we should operate carefully and meticulously during the pasting process of strain gauges
There are many types of strain gauges, including gold foil, wire, thin film, and semiconductor. Considering that the commonly used resistance strain gauges in electrical stress testing experiments are gold foil strain gauges (hereinafter referred to as foil strain gauges), let's take foil resistance strain gauges as an example and talk about the bonding techniques of strain gauges in electrical stress testing experiments
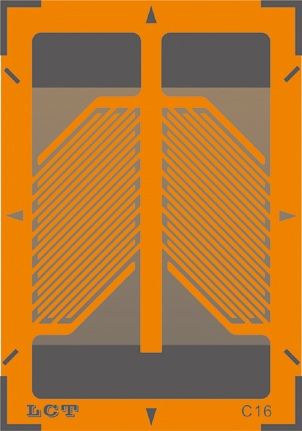
Foil type strain gauges are made of constantan or nickel chromium foil with a thickness of 0.0o3-0.01mm using photolithography and corrosion processes to form a grid shape. They consist of three main parts: resistance wire, substrate, and lead wire (as shown in Figure 1). Due to their advantages of uniform lines, low sensitivity dispersion, and wide testing range, these strain gauges are widely used. Before conducting electrical measurement experiments, The first problem we face is how to choose the correct strain gauge. As the main parameter indicators of foil strain gauges include: the geometric size of the strain gauge (including sensitive gate base length, strain gauge base length, sensitive gate base width, strain gauge base width), nominal resistance, sensitivity coefficient, allowable current, linearity, hysteresis, zero drift, ultimate strain, etc, Whether the appropriate and correct strain gauges can be selected correctly will directly affect the test results of the electrical measurement method. To choose strain gauges reasonably, we should have some understanding of their performance. Generally speaking, large-sized strain gauges can sense more average strain, which is conducive to improving measurement accuracy; Small strain gauges, although experiencing less average strain, can better reflect the stress at points. Therefore, the selection of strain gauge size should be based on the stress distribution of the component after being subjected to force and the relevant dimensions of the component itself.
Before selecting the strain gauges for pasting, we should conduct a strict and careful inspection of the gauges, which includes:
(1) The appearance inspection of strain gauges refers to checking whether there is any open circuit, short circuit, damage or breakage in various parts of the gauge, and whether there are bubbles or mold inside the gauge
(2) The detection of strain gauge resistance value. To ensure that the resistance error of the strain gauge used does not exceed the allowable range (usually within ± 0.5Q), it can be tested in advance using a high-precision ohmmeter or using a DC bridge to avoid inaccurate measurement results due to the large resistance error of strain gauges used in the same group
(3) Check if the center line is marked on the strain gauge. If not, vertical and horizontal lines should be drawn on the base cover to facilitate the pasting of the strain gauge. At the same time, positioning lines should be drawn on the surface of the tested piece. To ensure the proper adhesion of the strain gauge. If the surface quality of the test piece is not high, it will affect the adhesion of the strain gauge. Therefore, we use a scraper or file to remove the oxide skin and dirt at the test point, and then use fine sandpaper to polish the surface of the test piece (which should generally be about 3-5 times larger than the area of the strain gauge), and drill 45 along the direction of the patch. Cross stripes are applied to ensure a sufficiently smooth surface. Finally, a marking needle is used to draw lines at the measured point to ensure that the strain gauge can be firmly and smoothly adhered
Before pasting the strain gauge, it is necessary to use a degreased cotton ball dipped in a cleaning solvent, such as acetone, anhydrous alcohol, carbon tetrachloride, etc., to scrub the oil stains at the measured point until there are no obvious oil stains on the cotton ball. Also, be careful not to touch the cleaned surface with your hands at this time. Then, apply a thin layer of adhesive, such as KH501 and KH502 adhesive, to the adhesive surface of the strain gauge, which should generally be thin but not thick. Align the orientation line of the strain gauge with the marking on the specimen beforehand, At this time, close attention should be paid to whether the orientation line of the strain gauge coincides with the marking of the specimen. A layer of transparent paper (or wax paper) can be covered on the strain gauge, and one hand can pinch the lead line of the strain gauge. The other hand's finger should repeatedly and gently roll the surface of the transparent paper to squeeze out the excess glue and bubbles inside. When rolling the strain gauge, remember not to apply vertical force, and do not slide or rotate. After the glue and bubbles are completely squeezed out, You should also keep your fingers stationary for about one minute. Of course, you can also cover the surface of the specimen with a layer of glass paper, and then place a piece of silicon skin on it. Use a fixture or a flat pressure block to lightly press the adhesive part of the strain gauge. The purpose of these methods is to ensure that the strain gauge does not move incorrectly during the adhesive process, and that its orientation line completely coincides with the positioning line at the test point of the test piece
The pasted strain gauge can be allowed to dry naturally at room temperature for 15 to 24 hours. To save time, it can also be baked using an infrared lamp after a few hours of natural drying, but the temperature should be controlled within 40 80. Range. If baked at the beginning, the resistance coefficient of the strain gauge sensitive gate material will change suddenly with temperature, which is unfavorable for subsequent testing work
After the above work is completed, the quality of the strain gauge adhesion should also be checked. For example, the accuracy of the strain gauge adhesion position and azimuth angle can be observed through a magnifying glass, whether there are bubbles on the adhesion surface, and whether the strain gauge is firmly adhered; Use a multimeter to measure whether the strain gauge has any open circuit or short circuit phenomena. If there are no abnormalities, use a low-voltage rheometer to measure whether the insulation resistance between the lead wire of the strain gauge and the metal specimen meets the requirements. This resistance value should usually reach 100 M ohms or more to be effective
Next, we will paste a piece of wiring terminal near the lead wire of the strain gauge, and at the same time, we will paste a layer of insulation tape below the lead wire. This is intended to ensure insulation at the solder joint of the lead wire. Then, place one end of the measuring wire close to the lead wire of the strain gauge. After removing approximately 3mm of skin from the solder end of the measuring wire and applying solder, use an electric soldering iron to solder the lead wire of the strain gauge to the measuring wire. The connection should be fast and accurate to avoid the production of oxides that may affect the quality of the solder joint
After the strain gauge is connected to the wire, a protective layer should be immediately applied to the welding terminals of the strain gauge to prevent moisture, moisture, and aging, thereby extending its service life. Vaseline can be used as a protective agent for short-term protection, and sealing agents with good sealing can be used for long-term protection. For example, epoxy resin, chloroprene rubber, silicone rubber sealant, etc. Currently, the most convenient ones are "703" and "705" adhesives produced by Nanda Chemical Plant